
Building a wooden picket fence involves checking local regulations, gathering materials, and following a step-by-step installation process. With proper preparation and tools, even a novice can achieve a professional-looking result.
- Introduction to Wooden Picket Fences
- Benefits of Using Wood Fences
- Essential Tools and Materials for Installation
- Step-by-Step Installation Guide
- Choosing the Right Wood for Your Fence
- Care and Maintenance of Wooden Picket Fences
- Cost Considerations for Wooden Picket Fences
- Common Design Ideas for Wooden Picket Fences
- FAQ
Introduction to Wooden Picket Fences
Building a wooden picket fence can greatly enhance your home’s curb appeal and provide a charming boundary for garden or playground areas. Contrary to common belief, constructing a picket fence is relatively straightforward and feasible for the average DIY enthusiast with some basic tools and knowledge. Here’s what you need to know before diving into your project:
Before You Begin
- Permit: Check with your local municipality or homeowners’ association (HOA) to see if you need a permit. There may be codes regulating the size and style of the fence.
- Property Lines: Make sure your fence is within your property boundaries to avoid disputes with neighbors. Consider a property survey if necessary.
- Utilities: Contact local utility companies to ensure you’re not digging near underground power lines or other services.
- Height: Traditional picket fences are typically 3-4 feet tall. Confirm any HOA regulations regarding height before starting.
Materials Needed
- Posts: Usually spaced 6-8 feet apart, standard size is 4×4 square.
- Rails: Horizontal pieces connecting the posts, spaced evenly.
- Pickets: Available in various sizes, commonly 2¼” to 3″ in width with different top shapes.
Tools and Supplies
- Tools:
- Tape measure
- Snap chalk line
- Level
- String line
- Pencil
- Post-hole digger
- Pneumatic brad nail gun or power drill
- Garden tamper or shovel
- Supplies:
- Pre-assembled picket fence panels or pressure-treated 4×4 wood posts
- 2×4 wood rails
- Pickets
- 3-inch screws/brad nails
- Concrete
- Gravel
- Construction wood glue
- Optional: metal face brackets, post caps
Step-by-Step Guide
- Lay Out Everything: Position posts, railings, and pickets in the designated area and mark the post placements.
- Dig the Post Holes: Dig holes to about 1/3 the height of the fence, ensuring accuracy in measurement.
- Set the Fence Posts: Install posts securely into the ground with concrete or tightly packed soil.
- Attach Rails: Attach horizontal rails to posts, ensuring they are evenly spaced and securely attached.
- Attach the Pickets: Space pickets evenly and attach them to the rails, keeping them 2 to 3 inches off the ground.
- Paint or Stain: Wait 1-2 months after installation before painting or staining to let the wood acclimate. For tips on staining, you might find this guide useful.
- Add Post Caps: Add decorative post caps as a finishing touch if desired.
Types of Wood to Use
- Cedar: Naturally decay and pest-resistant, can last 15-25 years with proper maintenance.
- Cypress: Similar to cedar but requires regular treatments to maintain its natural oils.
- Pine: Needs pressure treatment to resist decay; susceptible to warping and cracks. For affordable pine solutions, check here.
- Redwood: Highly durable with natural insect and decay resistance, can last up to 25 years.
- Spruce: Economical, but less durable in humid environments.
Additional Considerations
- Picket Spacing Calculations: Ensure precise measurements for uniform picket spacing.
- DIY vs. Professional Installation: While a keen DIYer can handle small to moderate projects, hiring a professional may be beneficial for larger projects or if you lack experience. Read more on DIY installation vs professional work.
Building a wooden picket fence is a rewarding project that adds beauty and functionality to your outdoor space. With the right preparation and tools, even a novice can achieve a professional-looking result.

Benefits of Using Wood Fences
Building a wooden picket fence offers a range of advantages, making it an attractive option for homeowners seeking to improve their property’s functionality and aesthetic appeal. Here are some key benefits:
- Aesthetic Appeal: Wood fences provide a warm, rustic charm that blends well with various architectural styles. Each wooden board has unique grain patterns and textures, giving your fence a distinct, authentic look that complements natural surroundings.
- Cost-Effectiveness: Compared to other fencing materials like wrought iron or stone, wood fences are often more affordable. This makes them a popular choice for budget-conscious homeowners without sacrificing beauty. See more about cost-effective solutions here.
- Customization: Wood offers a high level of customization. Whether you prefer a classic picket style or a modern horizontal design, wood can be tailored to meet your specific tastes and match your home’s architectural style. Explore top wood fence styles for 2024.
- Privacy and Security: A wooden fence provides a physical barrier that enhances privacy and security. It creates a sense of seclusion and prevents unauthorized access, which is particularly beneficial for families with children and pets. Enhance your privacy.
- Durability: When constructed with high-quality wood like cedar, wooden fences are durable and resistant to decay, insects, and weathering. Cedar’s natural oils and tannins protect the wood, ensuring longevity with minimal maintenance. For more details, see durability tips.
- Simple Upkeep: Maintaining a wood fence is straightforward. Regular cleaning and occasional staining or sealing help preserve its appearance and extend its lifespan. Promptly addressing any signs of damage, such as cracks or loose boards, ensures long-term durability. Explore maintenance tips.
- Environmental Resistance: Cedar wood, in particular, withstands various weather conditions—including rain, snow, and sun exposure—without significant damage. This makes it a robust choice for different climates.
Implementing these aspects, a wood picket fence can transform your property by adding a visually pleasing, secure, and durable perimeter. With regular maintenance, the fence remains an attractive and functional feature for many years.
Overall, wooden fences seamlessly combine strength, flexibility, privacy, and beauty, making them an appealing choice for enhancing any property.
Essential Tools and Materials for Installation
Essential Tools and Materials for Installation
Building a wooden picket fence requires some preparation and the right tools and materials. Here’s what you need to get started:
Tools
- Tape Measure: To measure the length of your fence and the spacing of posts.
- Post-Hole Digger: Manual or gas-powered, depending on the number and depth of holes.
- Level: Ensures posts and pickets are plumb.
- Post Level: Keeps fence posts straight and aligned.
- Mason’s Line: For marking straight lines for post placement.
- Spray Paint: To mark posthole locations.
- Shovel: For digging holes and mixing concrete.
- Tamping Bar: To compact soil around posts.
- Hammer or Nail Gun: For attaching pickets.
- Screwdriver or Drill: For fastening screws.
- Saw: For cutting stringers and pickets to size.
- Safety Gear: Gloves, eye protection, and hearing protection.
Materials
- Wooden Posts: Treated to resist rot and insects.
- Pickets: Pre-cut or custom-designed based on your aesthetic preference.
- Stringers: Horizontal rails, typically 2x4s, to connect the posts and hold the pickets.
- Concrete Mix: For setting posts securely.
- Gravel: To provide drainage at the bottom of postholes.
- 2” Galvanized Nails or Screws: To attach pickets and stringers, ensuring durability.
- Paint or Stain: To protect and beautify the fence.
Step-by-Step Overview:
- Outline the Fence: Measure the area, drive stakes at corners, and stretch twine for accurate alignment. For more detailed guidance, check these tips.
- Dig Postholes:
- Holes should be around 10 inches in diameter and as deep as one-third the height of the post.
- Add 3 to 4 inches of gravel at the bottom for drainage.
- Set Posts:
- Place posts in holes and ensure they are level.
- Fill holes with a mix of concrete and soil, tamping down to eliminate air pockets.
- Install Stringers:
- Measure and cut 2x4s to fit between posts.
- Attach near the top and bottom of the posts using nails or screws.
- Attach Pickets:
- Position pickets evenly using a spacer block to maintain consistent gaps.
- Secure with nails or screws.
- Finish:
- Apply exterior-grade paint or stain to protect your new fence.
Having these tools and materials on hand makes the process of building a wooden picket fence more manageable and ensures a sturdy, attractive result. Happy building!

Step-by-Step Installation Guide
Building a wooden picket fence is a straightforward DIY project that, when done correctly, results in a charming and functional addition to your home. Follow these step-by-step instructions to ensure a successful installation:
Setting Fence Posts
- Mark the Layout: Use batter boards and string to outline the fence, ensuring it’s square.
- Dig Post Holes: Make sure holes reach below the frost line and add a 4-inch gravel base at the bottom.
- Set the Posts: Place posts in the holes and fill with concrete. Check for plumb alignment, and allow the concrete to cure before adding fill dirt.
Installing Fence Stringers
- Attach Stringers: Once the posts are secure, install horizontal rails (stringers) between them.
- Typically, one stringer is needed for every 2 feet of post height.
- Follow the ground’s contour and stagger joints on different posts for strength.
- For decorative fences, a bottom and top stringer suffice, with the top stringer positioned below the picket height.
Attaching Fence Pickets
- Ensure Even Gaps: Use a mason line as a guide for uniform picket height.
- Start at a Corner Post: Use a pneumatic nailer to secure the pickets, starting from a corner or gatepost.
- Use spacers to ensure equal gaps between pickets.
- Frequently check for plumb alignment with a level.
Finishing Touches and Maintenance
- Dry Before Painting/Staining: Allow treated wood to dry completely before applying paint or stain. Once water can soak in, the wood is ready.
- Protection and Aesthetics: Use fence paint for protection and a dramatic look, or an exterior stain and sealer to maintain natural wood beauty.
- Regular Maintenance: Keep your fence clean with periodic maintenance. Pressure washing can help remove dirt and grime. Follow these maintenance tips.
- Extend Fence Life: Regular checks and simple repairs can prolong the life of your fence.
By following these steps, you’ll be able to construct a wooden picket fence that not only enhances the beauty of your home but also serves a practical purpose. Happy building!

Choosing the Right Wood for Your Fence
Choosing the right type of wood for your picket fence is essential for ensuring durability, aesthetic appeal, and cost-effectiveness. Here’s a breakdown of the best wood options to help you make an informed decision:
Cedar:
- Longevity and Durability: Naturally resistant to rot, decay, and insect attacks due to natural oils.
- Aesthetics: Offers a rustic charm. You can stain it to enhance its reddish hues or allow it to age to a silvery gray. Explore more about cedar fences.
- Maintenance: Requires minimal upkeep.
- Workability: Easy to cut and shape, with a pleasant aroma during construction.
Redwood:
- Durability: High resistance to rot and pests due to its natural tannins.
- Aesthetics: Rich colors ranging from light cherry to darker reddish-brown. Minimal splintering.
- Maintenance: Needs occasional sealing to maintain its beauty.
- Workability: Easy to cut and customize. Look for suppliers with FSC certification for sustainable options.
Pressure-Treated Pine:
- Cost-Effectiveness: A budget-friendly choice that’s treated to resist rot, fungi, and pests.
- Durability: Sturdy and resilient post-treatment. Commonly used in playgrounds and other outdoor structures.
- Maintenance: Requires periodic staining or sealing, especially in harsh climates.
- Aesthetics: Starts greenish but weathers to silver-gray. Can be stained or painted to suit your taste.
Composite Wood:
- Durability and Maintenance: Made from wood fibers and recycled plastics for high resistance to the elements and low maintenance.
- Environmental Impact: Eco-friendly as it incorporates recycled materials.
- Workability: Uniform pieces without knots or grain patterns provide ease of installation and clean lines.
- Cost: Higher initial cost, but longevity and minimal upkeep balance it out.
- Warranties: Often comes with long-term warranties for peace of mind.
When choosing the wood for your fence, consider:
- Climate: How the wood stands up to local weather conditions.
- Maintenance Willingness: How much time you’re willing to devote to upkeep.
- Aesthetic Preferences: Your desired look and feel for the fence.
- Budget: Your financial constraints.
Whether you opt for the natural elegance of cedar and redwood or the durability and eco-friendliness of pressure-treated pine and composite wood, you’ll create a fence that enhances your home’s outdoor space for years to come. Learn more about choosing the right wood. Happy building!

Care and Maintenance of Wooden Picket Fences
Maintaining a wooden picket fence is crucial to ensure its longevity and keep it looking beautiful. Here are several tips for care and maintenance:
- Wood Selection and Treatment
- Use decay-resistant woods like Western red cedar or redwood.
- Pressure-treated pine is also a good option but must be chemically treated to resist rot and insects.
- Fence posts should always be pressure-treated since they have direct contact with the ground.
- Metal Posts
- Consider using steel posts instead of wood for maximum longevity; they can be covered with wood pickets for aesthetics.
- Painting and Staining
- Do not paint or stain your fence immediately after installation. Wait a few months, ideally until the end of a dry season, to allow the wood to dry completely.
- Reapply stain or paint every few years to protect the wood from moisture and UV rays, which helps retain color and integrity.
- Minimize Contact with Vegetation and Soil
- Keep plants, trees, and vines away from the fence to reduce moisture exposure.
- Avoid direct sprinkler contact. This can wear down finishes and accelerate rot.
- Ensure proper drainage around the fence to prevent water pooling, which can damage the posts.
- Annual Inspections and Repairs
- Inspect your fence annually for signs of damage or rot. Replace broken boards, hammer in loose nails, and tighten screws.
- Ensure all sections are securely attached. Check and adjust leaning posts.
- Examine and maintain hinges and locks on gates, lubricating them with automotive grease if necessary.
- Seal any cracks or splits with waterproof wood glue to prevent further deterioration.
- Regular Cleaning
- Clean the fence every two to three years to remove dirt, moss, mildew, and graying. Use a pressure washer for best results.
- If mold is present, use a solution of 20% bleach and 80% mild detergent, and spray an hour before washing.
- Resealing or Painting
- After cleaning, reapply paint or stain to seal out moisture and prevent wood rot.
- Use exterior oil-based stain or latex paint with UV protection. Let the wood dry for about a week before application.
By following these steps and maintaining your wooden picket fence consistently, you can ensure its beauty and functionality for many years to come.

Cost Considerations for Wooden Picket Fences
Building a wooden picket fence not only enhances curb appeal but also acts as a charming boundary marker. Here’s a detailed breakdown to help homeowners understand the costs involved:
Cost Breakdown
- Overall Cost: Installing a picket fence typically ranges from $1,600 to $2,200 for 100 linear feet, with the average cost being around $1,981, inclusive of a gate.
- Material Costs: Prices for materials alone range from $5 to $35 per linear foot, while installation adds an extra $10 to $45 per linear foot.
Material Choices
- Wood: Traditional and versatile, it costs $5 to $30 for materials and $10 to $40 for installation.
- Bamboo: Environmentally friendly but susceptible to rot, costing $10 to $15 for installation.
- Vinyl: Low maintenance, priced at $10 to $20 installed, though durability issues arise in cold weather.
- Metal: Durable but expensive, aluminum and steel cost $20 to $45 installed.
- PVC: Rot-resistant but pricey, with installation costs of $25 to $30.
- Composite: Long-lasting but prone to mold, costing $30 to $35 installed.
Height and Style Variations
- Height: Picket fences usually range from 4 to 8 feet. Costs increase by 25% to 30% for added height.
- Styles: Styles can vary from flat top designs to ornate French Gothic. Costs range from $10 to $30 per linear foot.
Labor Considerations
- Cost: Labor can be $5 to $15 per linear foot or $40 to $60 per hour. Hiring a professional ensures proper installation, which reduces future maintenance. For considerations on hiring fence builders, read this guide.
Customization Options
- Colors: Options include brown, green, blue, yellow, red, black, and the traditional white. Vinyl fence colors other than white or tan are more expensive.
- Designs: Customized picket shapes and decorative elements can add $1 or more per linear foot to the cost.

Common Design Ideas for Wooden Picket Fences
When it comes to designing your wooden picket fence, a plethora of creative options can transform your yard into a picturesque and functional outdoor space. Here are some inspiring ideas to get you started:
- Curved Designs: Adding curves to your picket fence can enhance its aesthetic appeal and create a welcoming entrance. Mount white slats to posts and rails that follow the natural curve of your walkway.
- Wavy Fences: Achieve a vintage cottage feel by cutting waves into the vertical edges and tops of each picket. This creates an organic, flowing look that pairs beautifully with cottage gardens.
- Modern Aluminum Slats: For a contemporary twist, consider a picket fence made from aluminum. These sleek, prefabricated panels offer a modern look while maintaining durability.
- Living Fence: Combine traditional wooden pickets with a tall hedge for a unique living fence. Regular maintenance, such as painting or staining, will keep your pickets in top condition.
- Color Coordination: Match your picket fence with the trim of your home by painting the posts. This creates a cohesive and polished appearance.
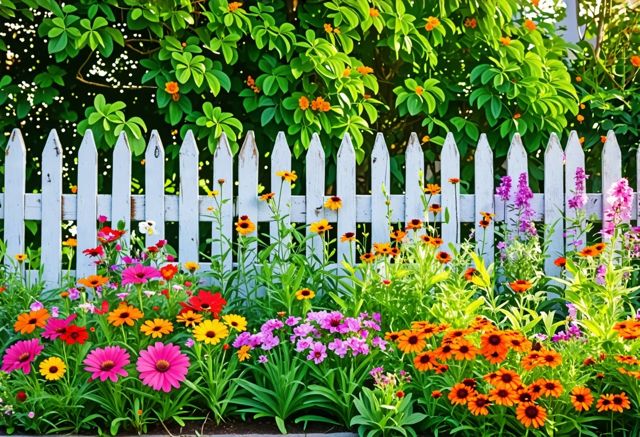
- Integrating Blooming Plants: Enhance the aesthetic appeal of your fence by planting vibrant flowers on either side. Ensure enough space for the plants to grow without causing damage to the fence.
- Elevated Designs: Elevate your picket fence with a stone or brick base to give it a more formal and traditional look.
- Short Fencing: Use small picket fences to border flower beds, paths, or sections of your yard. They provide a neat finish without obstructing access.
- Pet-Friendly Zones: Create safe play areas for pets using picket fencing kits. These can blend seamlessly into the garden and offer a more refined aesthetic than standard playpens.
- Mixed Materials: Enhance your fence with different materials like marble posts or steel slats for added security and a high-end appearance.
- Vegetable Patches: Thin slat picket fences work well for vegetable patches, allowing light to reach the plants while keeping the garden visually appealing.
- Climbing Plants: Add an archway and lattice to your picket fence for climbing plants like honeysuckle or wisteria. This creates a lush and enchanting garden feature.
- Minimalist Designs: Opt for a simple white picket fence with thinner slats and pointed posts for a clean and classic look. Keep in mind that this approach may require more upkeep.
- Accent Corners: Use a two-panel picket fence kit to add a charming touch to specific garden sections such as flower beds. This provides a decorative yet practical border.
Incorporating these ideas can significantly enhance the charm and function of your property’s landscape. Whether you opt for a classic design or a modern twist, a well-planned picket fence can elevate your garden’s appeal.
For high-quality materials and expert advice, consider exploring Pickets’ range of wood fencing options. If you need further assistance, our guide on building a fence can be incredibly useful. And for customized solutions, contact Pickets’ professional consultants.

FAQ
Do I need a permit to build a wooden picket fence?
Check with your local municipality or homeowners’ association (HOA) to see if you need a permit. There may be codes regulating the size and style of the fence.
How do I ensure my fence is within my property lines?
Make sure your fence is within your property boundaries to avoid disputes with neighbors. Consider a property survey if necessary.
How can I avoid digging near underground utilities?
Contact local utility companies to ensure you’re not digging near underground power lines or other services.
What is the typical height for a traditional picket fence?
Traditional picket fences are typically 3-4 feet tall. Confirm any HOA regulations regarding fence height before starting.
What materials do I need for building a wooden picket fence?
You will need posts (4×4 square, typically spaced 6-8 feet apart), rails (horizontal pieces), and pickets (available in various sizes). Standard supplies include concrete, gravel, screws/brad nails, construction wood glue, and optional metal face brackets and post caps.
What tools are required for building a wooden picket fence?
Essential tools include a tape measure, snap chalk line, level, string line, pencil, post-hole digger, pneumatic brad nail gun or power drill, and a garden tamper or shovel.
What types of wood are best for fences?
Options include cedar, cypress, pine, redwood, and spruce. Cedar and redwood are naturally resistant to decay and pests, while pine requires pressure treatment.
How should I maintain my wooden picket fence?
Regular cleaning, occasional staining or sealing, and addressing signs of damage promptly are key. Keep vegetation and direct sprinkler contact away from the fence to minimize moisture exposure.
What are the cost considerations for building a wooden picket fence?
The overall cost typically ranges from $1,600 to $2,200 for 100 linear feet. Material costs range from $5 to $35 per linear foot, with installation adding an extra $10 to $45 per linear foot.
What are some design ideas for wooden picket fences?
Design ideas include curved designs, wavy fences, modern aluminum slats, living fences, color coordination, integrating blooming plants, elevated designs, short fencing, pet-friendly zones, mixed materials, vegetable patches, climbing plants, minimalist designs, and accent corners.