
Regularly check for signs of rot, loose posts, or mildew on your wood fence. For repairs, remove damaged areas, treat exposed wood, and stabilize or replace sections as needed.
Identifying Rotting Wood on Your Fence
Identifying and managing decaying wood in your fence is essential to maintain its beauty and structural integrity. Rotting wood, primarily caused by moisture, is a common issue that can lead to significant damage if not properly addressed. Here’s a guide to help you spot, fix, and prevent decay, ensuring your fence remains in great condition for years to come.
Recognizing Decay
Regular checks are key to catching damage before it becomes a bigger problem. When inspecting your fence, there are several signs indicating the presence of rot:
- Discoloration: Look for areas where the wood has changed color, which often signifies the onset of decay.
- Texture Changes: Affected wood can feel soft or spongy when pressed with a tool like a screwdriver. It may also appear flaky or crumbly.
- Fungal Growth: Visible signs of fungi, such as cotton wool-like formations or actual mushrooms, serve as strong indicators of decay.
- Unusual Smells: A damp, musty odor around your fence could suggest ongoing moisture issues that contribute to deterioration.
How to Fix Damaged Wood
If you detect small areas of damage, they can often be handled with DIY methods:
- Remove: Scrape out the affected wood using a tool such as a chisel. This preparation is crucial for effective repair.
- Treat: Apply a wood hardener to reinforce the remaining wood structure, ensuring it’s fully dry before the next step.
- Fill: Use a reliable wood filler to patch the cleaned-out areas. For best consistency and durability, prepare the filler according to the manufacturer’s instructions.
- Sand and Finish: Once the filler is dry, sand it down to make sure it’s flush with the surrounding wood, then paint or stain to match your fence for a seamless repair.
For larger affected areas, replacing the entire section of wood might be necessary. This might require more technical skills or professional assistance, depending on the complexity of your fence’s design.
Preventing Future Decay
Taking proactive measures can significantly reduce the risk of wood deterioration:
- Moisture Management: Ensure your garden setup does not expose your fence to constant moisture. Keeping plants a fair distance away and ensuring soil doesn’t pile up against the fence helps prevent trapped moisture.
- Regular Staining: Treat your fence with a weatherproof stain that acts as a barrier against moisture and UV damage. Regular maintenance, including re-staining, is recommended every few years based on the manufacturer’s guidelines or more frequently depending on weather conditions.
- Proper Ventilation: Ensure good air circulation around your fence, which helps keep the wood dry and less susceptible to decay.
- Check and Repair: Regularly inspect your fence, especially after harsh weather conditions, and address any signs of damage or moisture ingress immediately.
By following these tips and regularly maintaining your fence, you can extend its lifespan and keep it looking fresh and sturdy. With the right care, your wood fence can continue to enhance the curb appeal and security of your home.

Stabilizing Loose Fence Posts
For new homeowners encountering the common issue of a wobbly wood fence post, the solution can be surprisingly straightforward and rewarding. Here’s a practical guide to stabilize your fence, ensuring it remains sturdy and upright.
- Identifying the Problem Begin by examining the reason behind the instability of your fence post. Common causes might include natural aging, weather-induced erosion, or damage such as decay. Addressing these factors is critical before proceeding with repairs.
- Preparing for Repair First, it’s necessary to reduce any pressure on the post. Carefully detach the horizontal stringers connected to the post and stabilize adjacent panels by propping them with spare wood. This step is vital to prevent any further strain on the fencing structure during repair.
- Executing the Fix For the third step, excavate around the post to remove a few inches of soil. Replace the excavated area with a layer of gravel. This is followed by adding rapid-set cement mix, ensuring the mixture surrounds the post adequately. Before the cement sets, which typically takes about 45 minutes, adjust the post using a mallet to ensure it’s perfectly vertical.
Practical Tips
- Employ a level tool to check the verticality of the post during and after the adjustment. This ensures that once the cement hardens, your fence post stands straight, enhancing both aesthetic and structural qualities.
- In cases where a post is damaged beyond simple stabilization efforts, replacement might be necessary. Contacting a reliable fencing dealer is the next best step.
This method not only restores the functionality and look of your fence but also prolongs its lifespan, offering a sense of accomplishment as you enhance your home’s exterior. Such DIY projects can save you considerable amounts in future repairs and replacements. If finding the right tools and materials is your next concern, consider purchasing items such as a durable fence from reliable sources.
Engaging in this relatively easy project can leave your fence looking great and standing strong, representing another step in mastering homeowner responsibilities.
Cleaning Mildew from Wooden Fences
Wooden fences add charm and privacy to your home but can be susceptible to mildew due to moisture and shade. Understanding how to effectively clean mildew from your wooden fence will not only improve its appearance but also extend its viability. If you’re tackling mildew, here’s a straightforward and effective way to get your fence looking great again.
Step-by-Step Cleaning Guide
- Prepare the Area: Before you begin, protect the surrounding area. Cover plants and grass near the fence with plastic sheeting. This prevents damage from cleaning solutions.
- Choose Your Cleaning Solution: A few options exist depending on the severity of the mildew.
- Water and a Scrub Brush: This gentle method can effectively clean your fence. Scrub the area thoroughly. For stubborn spots, a pressure washer might be necessary, but use it cautiously to avoid damaging the wood.
- Vinegar and Water: For a natural cleaning solution, mix half a cup of white vinegar with one gallon of water. This mixture effectively breaks down mildew. Apply it to the affected areas, let it sit for about 15 minutes, then scrub and rinse.
- Commercial Cleaners: For tougher jobs, a commercial product like Simple Green can be used. It’s designed to tackle stubborn stains and is safe for most wood types. Always test it on a small area of the fence first.
- Cleaning Method:
- Apply your chosen cleaning solution using a scrub brush to work into the mildew.
- Rinse the fence thoroughly with a hose to remove all residues of the cleaner and loosened mildew.
- Allow the fence to dry completely. Ideally, choose a sunny day for cleaning as it speeds up the drying process and helps prevent mildew from returning.
- Post-Cleaning Care: After cleaning, inspect the fence for any damage. Sand any rough spots to prevent further deterioration. To provide additional protection against moisture, apply a waterproof sealant. This step is vital in prolonging the life and beauty of your fence.
Why Regular Maintenance Matters
Mildew isn’t just an eyesore; it can actually shorten the life of your wooden fence by causing rot and deterioration. Regular cleaning in the fall and spring helps prevent mildew from taking hold. If you notice mildew forming, taking immediate action can save you time and expense down the road.
If you find that the damage is beyond simple cleaning, it might be time to consider professional advice or potentially replacing parts of the fence.
By maintaining your fence regularly, you not only keep it looking its best but also protect your investment. A little effort goes a long way in keeping your wooden fence strong and attractive for years to come.

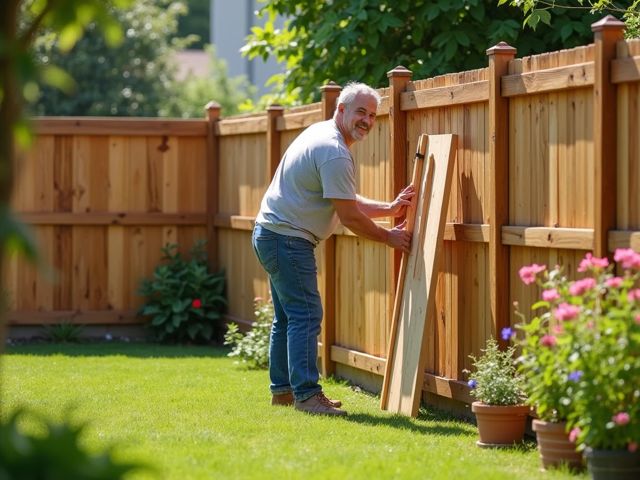
Replacing Broken Fence Boards
When a wood fence board breaks or shows signs of wear, it’s important for homeowners to act quickly to maintain their property’s appearance and structural integrity. This guide walks you through the process of replacing broken fence boards, ensuring longevity and functionality.
Step 1: Assess the Damage
Start by carefully examining your fence to pinpoint any broken, loose, or decayed boards. Knock gently on suspected areas to check for hidden decay, which could indicate more severe issues like insect infestation or water damage. Addressing these problems early can save you time and money.
Step 2: Gather Your Tools and Materials
You’ll need basic tools such as:
- Hammer or nail gun
- Screwdriver and/or drill
- Saw, for cutting wood to size
- Wood glue or epoxy for extra hold
- Measuring tape and level for accuracy
- Safety gear, like gloves and goggles, to protect yourself while working
Step 3: Remove the Damaged Boards
Using a pry bar, remove the damaged boards carefully. Be mindful not to harm the surrounding boards. This step requires patience and precision to avoid causing more damage to the fence structure.
Step 4: Find and Prepare Replacement Boards
Measure the empty space and cut your new Greenes Picket Fence 16 ” X 12 ‘ White Bulk board to fit perfectly. Ensure the new board matches the existing ones in material and size. This consistency is key to maintaining the aesthetic and structural balance of your fence.
Step 5: Install the New Boards
Secure the new boards in place using nails or screws. Be sure to shift the fasteners slightly from the old holes to ensure a strong hold. Using a level, verify that each board is straight and aligns properly with the rest of the fence.
Step 6: Seal and Protect
To extend the life of your fence, apply a preservative sealant on the new boards. This extra layer protects against moisture and UV damage, crucial for preventing future decay and maintaining the fence’s new appearance.
Regular maintenance includes:
- Inspections for any signs of wood damage or instability
- Keeping vegetation trimmed back to prevent moisture and root damage
- Annual cleaning and staining to protect from the elements
For those less inclined to DIY tasks or facing extensive damage, consider hiring a professional. Professional services can ensure high-quality repairs that might be more cost-effective in the long run because of their expertise and equipment.
Repairing a fence yourself can be a rewarding project, boosting not only your home’s curb appeal but also your personal satisfaction in maintaining your living space. Prompt action at the first sign of damage can save substantial effort and resources later on.

Fixing a Leaning Fence
Fixing a leaning fence may seem daunting, but with the right approach, you can restore stability and appearance to your yard. Here’s a straightforward guide to help you manage and repair a leaning fence efficiently.
Start by evaluating the cause of your fence’s tilt. Weather conditions like heavy rain, snow, or wind often contribute to such issues, along with impacts from falling branches or pressure from tree roots. Identifying the specific cause is critical for effective repairs.
Once the cause is determined, prepare for the repair:
- Gather Your Tools: You’ll need basic tools like a screwdriver, pliers, a shovel, and a saw. Safety gear such as gloves and goggles is also important. Ensure you have everything handy before you start.
- Clear the Area: Remove any obstacles around the fence, like trimming bushes or moving garden equipment, allowing easy access to the fence.
- Stabilize the Leaning Post: Dig around the affected post to expose the concrete footing. Then, using a level, adjust the post until it’s straight. Support it temporarily with two-by-fours anchored in the ground.
- Prepare for Concrete: If the post is salvageable, pour new concrete around its base using a brick trowel for a smooth finish. For completely damaged posts, consider replacing them. Fast-setting concrete mix is a great choice, ensuring quick and strong setting.
- Finishing Touches: Reattach any fence parts you had to remove and wait for the concrete to cure. Once dry, refill the remaining hole with soil up to ground level.
For areas that need new materials, consider using high-quality replacements like the Greenes Picket Fence 16 ” X 12 ‘ White Bulk, which fortifies the structure and enhances the aesthetic appeal.
Should you find the post irreparable, installing new posts next to the leaning one can add the needed stability. Make sure these are installed plumb and secure them well with concrete.
After repairing the fence, perform a thorough inspection to ensure everything is tight and upright. You might also want to apply a fresh stain or paint to protect the wood and boost your home’s curb appeal.
Maintaining your fence is key to avoiding future problems. Regular inspections can help catch issues early, saving you time and money in the long run.
If any of these steps seem overwhelming or if DIY isn’t your strength, hiring a professional fence repair service is a wise decision.
Through these steps, you’ll not only enhance your home’s security and privacy, but you’ll also learn valuable skills in home maintenance. A well-maintained fence is not just a boundary; it’s a significant part of your home’s overall presentation and value.

FAQ
How can I identify wood decay on my fence?
Look for signs such as discoloration, soft or spongy texture, fungal growth, and unusual smells around your fence.
What steps should I take to fix damaged wood?
Remove the affected wood, treat the remaining structure with a hardener, fill the area with wood filler, and sand and finish to match the surrounding wood.
How can I prevent future wood decay?
Manage moisture by keeping plants away from the fence, regularly stain the wood, ensure proper ventilation, and inspect for damage frequently.
What should I do about a loose fence post?
Identify the cause of the instability, then reduce pressure on the post, excavate around it, and use gravel and rapid-set cement to stabilize it vertically.
What are effective ways to clean mildew from wooden fences?
Prepare the area, choose a cleaning solution such as water and a scrub brush, vinegar and water mix, or commercial cleaners. Scrub the fence, rinse thoroughly, and let it dry.
How do I replace broken fence boards?
Assess the damage, gather necessary tools, remove the damaged boards, measure and prepare replacement boards, install them securely, and apply a sealant for protection.
How can I fix a leaning fence?
Identify the cause of the lean, stabilize the post by digging around it, adjust it using a level, pour new concrete if needed, and ensure everything is secure before finishing.
What ongoing maintenance should I perform on my wood fence?
Conduct regular inspections for damage, trim vegetation around the fence, and carry out annual cleaning and staining to protect it from the elements.