
To install a cedar split rail fence, start by digging holes for the posts and setting them in place with gravel for drainage. Next, insert the rails into the posts, ensure everything is level, and make minor adjustments as needed.
What is a Cedar Split Rail Fence?
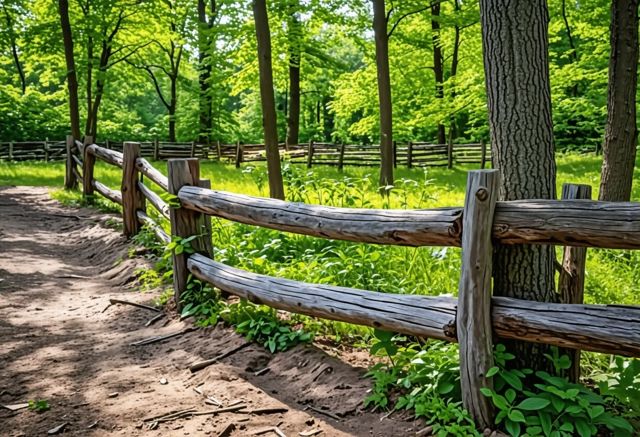
Cedar split rail fences are made of vertical posts and horizontal rails, offering a rustic look. Cedar is a popular choice because it contains natural oils that make it weather-resistant and durable, especially in fields and pastures.
Split rail fences come in different heights:
- 2-rail (36”): Used for property lines, guiding foot traffic, and decorative purposes in residential areas.
- 3-rail (48”): Common on farms and in residential areas to contain pets and kids when paired with wire mesh.
- 4-rail (54”-60”): Often seen in horse farms and community gardens, but requires longer lead times for acquisition.
To improve containment, you can add wire mesh to your fence:
- Welded Wire Mesh: Affordable, blends well, but weak and hard to install on uneven ground.
- Woven Wire Mesh: Stronger, adapts to uneven terrain, and available in various sizes.
- Vinyl Coated Chain Link Mesh: Most expensive, perfect for pets and kids, available in multiple colors, and follows ground contours well.
When it comes to gates, you have options:
- Wood Split Rail Gates: Heavier, prone to sagging.
- Wood Picket Gates: More reliable, offers various hinge and latch options.
- Welded Steel Tube Gates: Lightweight, strong, cost-effective, suitable for large openings, and available in painted or galvanized finishes.
Installing a split rail fence involves:
- Digging holes and setting posts, securing gate posts with concrete.
- Inserting and overlapping the rails in the post holes.
- Packing dirt tightly around posts and repacking after rainfall if the soil settles.
Expert tips for fencing installation can provide further details on setting up your fence correctly.
Maintenance for cedar split rail fences is minimal:
- Natural weathering is often preferred.
- Staining or water-sealing can boost durability.
- Replace posts or rails as needed.
This type of fence is an affordable and versatile choice for large ranches and residential areas, combining functionality with an appealing look.

Benefits of Cedar Split Rail Fences
Cedar split rail fences add a rustic charm to any property and offer several benefits:
- Cost-Effective: These fences are less expensive compared to other types, and DIY installation can cut labor costs significantly.
- Easy Installation: Perfect for DIY enthusiasts, cedar split rail fences are simple to put together, needing only basic tools.
- Aesthetic Appeal: They offer a timeless, natural look that complements outdoor spaces beautifully.
- Ideal for Large Areas: Great for large properties, the design allows for longer spans between posts, making them efficient and practical for farms and ranches.
- Low Maintenance: Cedar fences need minimal upkeep. The wood is treated to resist weather and decay, ensuring the fence lasts for years.
Read more about low maintenance strategies to keep your fence in top shape.
These advantages make cedar split rail fences a popular choice for many homeowners. They add value and character to properties while being practical and cost-effective.
Tools and Materials Needed
To install a cedar split rail fence, gather the following tools and materials:
- Measuring Tape or Wheel: Measure the area where the fence will go.
- Spray Paint: Mark the post positions.
- Post-hole Digger or Auger: Dig holes for the posts.
- Gravel: Use for drainage at the base of each post hole.
- Level: Ensure posts are plumb.
- Stakes and String: Mark the fence line and post placement.
- Brace: Hold posts in place while setting them.
You’ll need cedar split rails and posts. Rails usually come in 11-foot lengths, and posts are designed for either two or three rails. For example, if you need a 200-foot fence and want three levels, you might need 19 posts and 57 rails.
Consider buying extra materials for potential mistakes or adjustments. Preparing the right tools and materials will make your installation smoother.

Step-by-Step Installation Guide
Start by marking where your fence will go. Use stakes and string to define the fence line, making sure it’s straight and includes corners and gates.
Gather Your Materials
- Cedar posts and rails
- Tape measure and level
- Post hole digger or power auger
- Gravel
- Soil
Prepare the Posts
- Dig the holes using a post hole digger or auger. Make them about a third the height of the posts.
- Add 6 inches of gravel to the bottom of each hole for drainage.
- Place the posts in the holes, ensuring they stand 6 inches above ground for mowing.
- Fill the holes around the posts with soil, tamping it down to keep the posts firm.
Installing a wooden gate can be a great addition to complete your fence.
Add the Rails
- Start with the end posts to have a reference point.
- Insert rails into the holes of the posts; let their weight hold them in place.
- Use a level to ensure the posts are straight.
- Continue placing the line posts and inserting rails, making minor adjustments as needed.
Final Touches
- Check the alignment and plumb of each post one last time.
- Make minor adjustments before the soil fully settles.
By following these steps, you’ll have a sturdy cedar split rail fence that adds a rustic charm to your property.

Maintenance Tips for Cedar Split Rail Fences
Cedar split rail fences are known for their rustic charm and durability, but they do need some maintenance to stay in good shape. Regular care will make sure your fence lasts a long time and keeps looking great.
To start, keep an eye on the condition of the rails and posts. Replace any broken or rotting parts right away. This prevents bigger problems later on and helps your fence stay strong.
Here’s what to watch for:
- Weathering: Let your cedar fence weather naturally. This means no need for painting or major repairs unless you see significant damage.
- Periodic Checks: Check for loose rails and secure or replace them as needed.
- Rot Prevention: In wetter climates, consider checking for rot more often and treating the wood if necessary.
For routine cleaning, use a garden hose to rinse off dirt and debris. If you notice mold or mildew, a mix of water and mild detergent can help clean the surface without harming the wood.
Understanding how to stain your fence can greatly enhance its longevity.
Lastly, trim any vegetation around the fence. Plants can hold moisture against the wood, increasing the risk of rot. Keeping the area clear helps the wood stay dry and in good condition.

Cost and Budgeting for Your Fence Installation
Cedar split rail fences come with various costs. On average, expect to pay between $7 to $12 per linear foot for cedar fencing installation. Here are key points to consider for budgeting:
- Material Cost: Cedar materials range from $18 to $35 per linear foot. This doesn’t include hardware, posts, and footings.
- Labor Type: Medium-cost labor is typical for cedar fence installations.
- Site Conditions: Costs can be higher if site conditions are difficult or if using premium materials.
For an accurate estimate, use online cost calculators that account for your zip code. This ensures you get up-to-date pricing and helps in effective budgeting. Always consult with local professionals for precise quotes tailored to your specific project requirements.
Explore factors influencing fence installation cost to better plan your budget.

Common Issues and How to Prevent Them
Common problems with Cedar Split Rail Fences and Prevention Tips
Cedar split rail fences are beautiful and durable, but they can still face some common problems. Here are the most frequent issues homeowners encounter and ways to prevent them:
Rotting Wood
- Problem: Rotting is common, especially at the base of posts.
- Prevention: Apply a water-resistant sealant to the posts before installation. Ensure the fence is installed in well-draining soil.
Leaning Posts
- Problem: Posts may lean due to soil erosion or improper installation.
- Prevention: Use a level during installation to ensure posts are perfectly vertical. Pack soil tightly around each post and use gravel or concrete for added stability.
Insect Damage
- Problem: Termites and other insects can damage the wood.
- Prevention: Treat the wood with an insect-repellent solution. Regularly inspect the fence for signs of insect activity and address it immediately.
Weathering and Discoloration
- Problem: Exposure to the elements can cause the wood to weather and change color.
- Prevention: Apply a UV-protective finish to the fence. Regularly clean the fence and reapply the finish as needed.
Loose Rails
- Problem: Rails can become loose over time.
- Prevention: Use the right size rails for the posts and ensure they fit snugly. Check the connections regularly and tighten or replace any loose rails.
By addressing these common issues, you can keep your cedar split rail fence looking great and standing strong for many years. If you need professional help, consider Pickets for all your fencing needs.

FAQ
What is a Cedar Split Rail Fence?
A cedar split rail fence is made from vertical posts and horizontal rails, giving it a rustic look. Cedar is a popular choice because of its natural oils that make it weather-resistant and durable. These fences come in various heights and can be used for different purposes such as property lines, containing pets and kids, and decorative purposes.
What are the different heights available for Cedar Split Rail Fences?
Cedar split rail fences come in different heights:
- 2-rail (36”): Used for property lines, guiding foot traffic, and decorative purposes in residential areas.
- 3-rail (48”): Common on farms and in residential areas to contain pets and kids when paired with wire mesh.
- 4-rail (54”-60”): Often seen in horse farms and community gardens, but requires longer lead times for acquisition.
What types of wire mesh can be added to Cedar Split Rail Fences?
To improve containment, you can add:
- Welded Wire Mesh: Affordable but weak and hard to install on uneven ground.
- Woven Wire Mesh: Stronger, adapts to uneven terrain, and available in various sizes.
- Vinyl Coated Chain Link Mesh: Most expensive, perfect for pets and kids, follows ground contours well.
What gate options are available for Cedar Split Rail Fences?
Gate options include:
- Wood Split Rail Gates: Heavier and prone to sagging.
- Wood Picket Gates: More reliable with various hinge and latch options.
- Welded Steel Tube Gates: Lightweight, strong, and cost-effective, available in painted or galvanized finishes.
How do you install a Cedar Split Rail Fence?
- Dig holes and set posts, securing gate posts with concrete.
- Insert and overlap the rails in the post holes.
- Pack dirt tightly around posts and repack after rainfall if the soil settles.
How do you maintain a Cedar Split Rail Fence?
Maintenance is minimal. Natural weathering is often preferred, but staining or water-sealing can boost durability. Replace posts or rails as needed, and keep an eye on weathering, loose rails, and rot.
What are the benefits of Cedar Split Rail Fences?
- Cost-effective: Less expensive compared to other types and DIY installation can cut labor costs.
- Easy installation: Simple to assemble with basic tools.
- Aesthetic appeal: Offers a timeless, natural look.
- Ideal for large areas: Efficient and practical for farms and ranches.
- Low maintenance: Treated to resist weather and decay, requiring minimal upkeep.
What tools and materials are needed for installation?
You’ll need:
- Measuring tape or wheel
- Spray paint
- Post-hole digger or auger
- Gravel
- Level
- Stakes and string
- Brace
- Cedar posts and rails
What are the steps for installing a Cedar Split Rail Fence?
- Mark the fence line using stakes and string.
- Dig holes and add gravel.
- Place posts, fill holes with soil, and tamp it down.
- Insert rails into posts.
- Check alignment and make adjustments before the soil settles.
What common issues occur with Cedar Split Rail Fences and how can they be prevented?
Common issues include:
- Rotting Wood: Use water-resistant sealant and install in well-draining soil.
- Leaning Posts: Ensure posts are vertical and pack soil tightly around posts.
- Insect Damage: Treat wood with insect-repellent solution.
- Weathering and Discoloration: Apply a UV-protective finish.
- Loose Rails: Ensure rails fit snugly and check connections regularly.
What are the costs associated with Cedar Split Rail Fences?
On average, expect to pay between $7 to $12 per linear foot for installation. Material costs range from $18 to $35 per linear foot, and labor costs are generally medium. Use online cost calculators for accurate estimates based on your zip code.