
To install dog ear fence pickets, start by setting your vertical posts with concrete and attaching 2×4 cross beams for support. Finally, attach the pickets with galvanized nails or screws, ensuring they’re evenly spaced and level.
What are Dog Ear Fence Pickets?
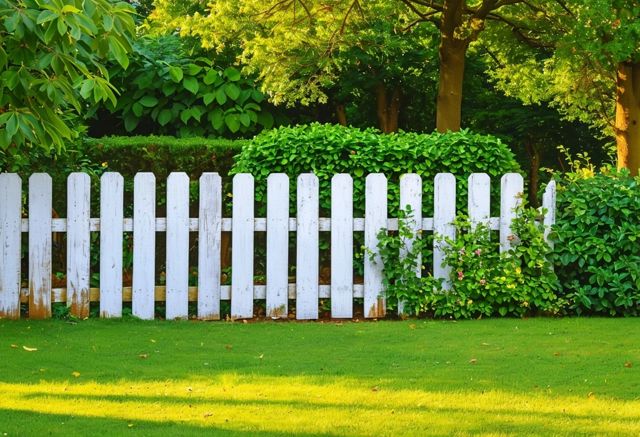
Dog ear fence pickets are a popular choice for homeowners and property managers looking to install wood fences. Named for the distinctive clipped corners on the top of the picket, these fences offer a versatile and classic look that fits many types of properties.
Dog ear fence pickets come in various sizes and materials. Common sizes include:
- 5/8 in. x 5-1/2 in. x 6 ft.
- 1 in. x 6 in. x 8 ft.
- 3/4 in. x 6 in. x 6 ft.
You can find pickets made from different types of wood, such as:
- Pine
- Cedar
- Spruce
- Fir
These pickets can be treated or untreated. Treated wood offers extra protection against the elements and pests, while untreated wood can be stained or painted to match your desired aesthetic.
Installation styles for these pickets include:
- No Dig
- Dig
- Free Standing
- Surface Mounted
Dog ear fence pickets provide a professional and polished look to any property, making them a preferred choice for many fencing projects. They are available for purchase individually or in bulk, depending on the size of your fencing project.

Benefits of Using Dog Ear Fence Pickets
Dog ear fence pickets are a great choice for adding both function and style to your property. These pickets have corners cut at angles, providing a unique visual appeal compared to flat-topped fences.
Before installing dog ear fence pickets, consider the following:
- Check Local Building Codes: Ensure you have the necessary permits, and check with your homeowner’s association if needed.
- Layout Planning: Plan your layout carefully, including the location of gates, corners, and the property line. Ensure full pickets at each corner for a consistent look.
Preparation and Installation
Dog ear pickets can be custom cut using a circular saw.
- Spacing: Choose between solid dog ear fences for complete privacy or spaced pickets for airflow and limited visibility.
- Materials: While wood is a common choice, vinyl and composite dog ear fences offer less maintenance and greater durability.
Aesthetic and Practical Benefits
Dog ear fences break the monotony of standard flat-topped fences. They offer:
- Charm: Their angled tops add a unique character to your backyard.
- Versatility: Suitable for various settings, providing both full privacy or airflow options.
With proper planning and installation, dog ear fence pickets can enhance your property’s aesthetic and functional appeal.
Materials Needed for Installation
To install dog ear fence pickets, you’ll need the following materials:
- Vertical Posts: These form the backbone of your fence.
- Dog Ear Pickets: Ensure you have enough for the entire fence.
- 2×4 Cross Beams: These connect the posts and support the pickets.
- Cement: Use this to securely set the posts in the ground.
- Fasteners: Both galvanized nails and outdoor screws are recommended.
Before starting, measure the area and calculate the number of materials needed. For a 100-foot fence, you’ll likely require:
- Around 227 pickets
- Approximately 39 cross beams
- About 13 posts
Gather your tools, which should include:
- A tape measure
- Level
- Circular saw
- Drill
- Screws
- Post hole digger
Make sure to also have a spacer tool or a piece of scrap wood to ensure even spacing between pickets. Always check local building codes and obtain necessary permits before starting your project.

Step-by-Step Guide to Installing Dog Ear Fence Pickets
To build a dog ear fence, start by gathering all necessary materials: pickets, posts, 2×4 cross beams, cement, nails, and screws. Consider getting extra to account for any mistakes or warped wood.
Step 1: Mark and Dig Post Holes
- Use lengths of 2×4 to mark post hole locations.
- Dig each hole about 30 inches deep.
- Set posts in the holes with concrete and ensure they are level.
Step 2: Attach Cross Beams
- Attach 2×4 cross beams to the posts based on measured distances for alignment.
- Secure beams using screws, maintaining careful leveling.
- For corners or around trees, use metal brackets for additional support.
Step 3: Prepare for Pickets
- Use a string line for height consistency.
- Pre-drill pilot holes in the pickets to prevent splitting.
- Keep a spacer tool or scrap piece of wood handy for consistent spacing (around 2 3/4 inches).
Step 4: Attach Pickets
- Use galvanized brad nails for initial placement and outdoor screws for long-term security.
- Start from one corner, ensuring each picket is level.
- For slopes and corners, adjust the height and angles of the pickets to ensure a neat finish.
Step 5: Final Touches
- Trim excess picket lengths with a circular saw if needed.
- Add gates or decorative elements.
- Perform regular inspections, repairs, and stain or paint as necessary for longevity.
By following these steps, you’ll create a durable and visually appealing dog ear fence to secure your yard. Proper maintenance will keep it in good condition for years to come.

Maintenance Tips for Dog Ear Fence Pickets
Maintaining dog ear fence pickets is essential for their longevity and appearance. Here’s how you can keep your fence in top shape:
- Inspect Semi-Annually: Check your fence for any damage or cosmetic flaws every six months. Look for loose nails or screws and address these issues promptly.
- Stain Regularly: After installation, allow your fence to acclimate for 5 to 10 weeks before applying an oil-based stain. This helps protect the wood from UV rays and weather damage. Reapply the stain every couple of years to maintain protection.
- Power Washing: Use a soft setting on a power washer to clean the fence. This will remove debris and restore the wood’s natural color and grain.
- Painting Options: If you prefer painting, make sure to properly seal the fence. Choose from various colors and finishes to match your outdoor decor.
Enhancing the appearance of your dog ear fence pickets can add to their charm:
- Stains: Available in many colors and textures, stains can complement any style—from rustic to sleek.
- Plants: Incorporate plants like vines to grow on the lattice topper or add planter boxes for a burst of color.
- Gates and Arbors: Adding gates or arbors not only improves functionality but also adds an elegant touch.
These simple steps ensure your dog ear fence picket remains a beautiful and durable part of your property.

Comparing Dog Ear Fence Pickets to Other Styles
When choosing dog ear fence pickets, consider their distinct styles and benefits. There are three main styles:
- Board on Board: Offers maximum privacy with overlapping pickets creating a solid barrier.
- Shadowbox: Alternates pickets on either side of the rail, providing an attractive appearance and allowing airflow.
- Traditional: Features evenly spaced pickets with small gaps, balancing privacy and airflow, ideal for windy areas.
To begin installation, prepare thoroughly:
- Gather necessary tools and materials.
- Check local regulations and obtain permits.
- Plan the layout considering terrain and desired height.
- Accurately mark post holes.
For installing fence panels and pickets:
- Set Fence Posts: Ensure they are level and properly spaced.
- Attach Fence Panels: Use nails or screws to secure panels to posts.
- Attach Pickets: Install vertical pickets with even spacing.
- Connect Backer Rails: Add horizontal beams for stability.
- Install Gates: Align the gate for smooth operation.
- Finish Fence: Apply protective finishes like stain or paint.
Safety is paramount:
- Wear protective gear, such as gloves and safety goggles.
- Use proper lifting techniques and handle power tools with care.
Proper planning and using the right tools will help you successfully install a durable and appealing dog ear fence. This fence can enhance your property’s privacy and charm.

FAQ
What are dog ear fence pickets?
Dog ear fence pickets are a popular choice for wood fences, known for their distinctive clipped corners on the top. They offer a classic look that suits many types of properties.
What sizes and materials are available for dog ear fence pickets?
Common sizes include 5/8 in. x 5-1/2 in. x 6 ft, 1 in. x 6 in. x 8 ft, and 3/4 in. x 6 in. x 6 ft. They can be made from pine, cedar, spruce, or fir and are available in treated or untreated options.
What are the advantages of dog ear fence pickets?
Dog ear fence pickets can be painted or stained for customization, come in pressure-treated options for durability, and are available in various wood types to match different preferences and budgets.
What installation styles can I use for dog ear fence pickets?
You can install dog ear fence pickets using No Dig, Dig, Free Standing, or Surface Mounted styles.
What should I consider before installing dog ear fence pickets?
Before installation, check local building codes, obtain necessary permits, and plan your layout carefully, including the location of gates and corners. Ensure full pickets at each corner for a consistent look.
What materials are needed to install dog ear fence pickets?
You’ll need vertical posts, dog ear pickets, 2×4 cross beams, cement, and fasteners such as galvanized nails and outdoor screws. Tools like a tape measure, level, circular saw, and drill are also essential.
What are the steps to install dog ear fence pickets?
- Mark and dig post holes
- Attach cross beams
- Prepare for pickets
- Attach pickets
- Add final touches like gates or decorative elements
How do I maintain dog ear fence pickets?
Inspect your fence semi-annually, apply an oil-based stain regularly, use a soft setting on a power washer for cleaning, and consider painting for additional protection. Enhance your fence’s appearance with stains, plants, or decorative elements.
How do dog ear fence pickets compare to other styles?
Dog ear fence pickets can be compared to board on board (maximum privacy), shadowbox (attractive appearance with airflow), and traditional styles (balanced privacy and airflow). Each style has its own benefits and installation considerations.