
Installing Home Depot pickets involves planning, measuring, and spacing the pickets evenly. You need tools like a tape measure, level, hammer, and screws or nails for a straightforward installation process.
Introduction to Home Depot Pickets
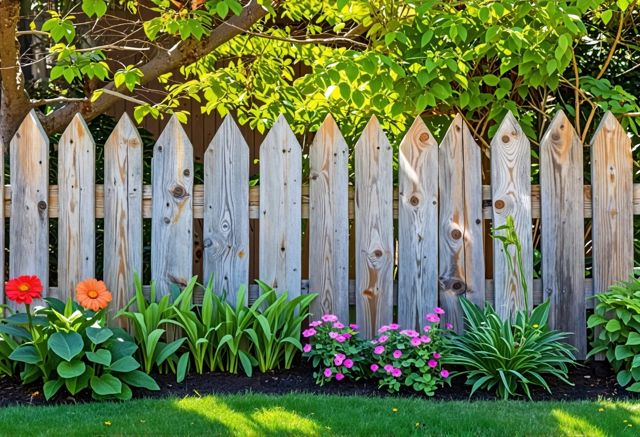
When choosing fence pickets from Home Depot, homeowners have many options. These pickets come in various materials and styles to suit diverse needs. Home Depot offers wood pickets, which are a popular choice due to their natural look and durability.
- Types of Wood: Cedar, pine, and redwood are common choices. Learn about the types of wood for fencing.
- Styles: Dog-ear, flat-top, gothic, and pointed. Explore top wood fence styles.
- Sizes: Typically range from 4 to 8 feet in height.
Installing Home Depot pickets is straightforward. It involves planning, measuring, and spacing the pickets evenly. Tools needed include a tape measure, level, hammer, and screws or nails.
- Planning: Decide on the fence line and mark it.
- Measuring: Measure the total area and divide by the width of the picket to know how many you need.
- Spacing: Use a consistent gap between each picket for a clean look. Get tips for spacing and installation.
Maintenance of wood pickets includes sealing, staining, or painting. This helps protect the wood from weather damage and extends the lifespan of the fence. Read about maintaining your wood fence.
- Sealing: Protects the wood from moisture.
- Staining: Enhances the wood’s natural beauty.
- Painting: Offers a range of color options.
Home Depot pickets provide both functionality and aesthetic appeal for any home project.

Tools Needed for Installation
To install Home Depot pickets, you need the right tools. Below is a handy list of what you’ll need:
- Posthole digger: For digging holes for the fence posts.
- Shovel: To help with the digging and to move soil.
- Tamping bar: To compact soil around the posts.
- Level: To ensure posts and pickets are plumb.
- Mason’s line: For marking straight lines across posts.
- Tape measure: To measure spaces and lengths accurately.
- Concrete: For setting the posts securely.
- Pneumatic nailer or hammer: To attach pickets to the stringers.
- Furring strips: To help align the tops of the pickets.
- Spacer: For even spacing between pickets.
- Wood wedges: To prop panels and keep them level if necessary.
- Screws or nails: For fastening panels and pickets.
- Safety gear: Including gloves, safety glasses, and ear protection.
To start, outline your fence layout with string and batter boards. Dig postholes based on local code depth requirements. Set your posts in concrete and make sure they are plumb. Install horizontal rails or stringers between the posts, then attach pickets using the level and spacer. Find out how to install wood fence panels.
For a seamless finish, overlap pickets at the corners and use a pneumatic nailer for quick attachment. Let treated wood dry before painting or staining. Regular maintenance, like cleaning with a pressure washer, can extend the life of your fence. With these tools and steps, you can easily install a durable and attractive fence.
Step-by-Step Installation Process
Installing pickets can be straightforward if you follow these steps. Start by measuring the area where the fence will go. Mark the spots where the fence posts will be placed. Dig holes for the posts, making them about a third of the post’s length. Use a post hole digger for accuracy.
Next, set the posts in the holes and fill them with concrete. Use a level to make sure each post is straight. Let the concrete dry for at least 24 hours. Once the posts are steady, attach the horizontal rails to them. These rails will support the pickets.
Attach the pickets to the rails. Line up each picket with the string line for even spacing. Use screws or nails to secure them in place. Here are some key points to remember:
- Space pickets evenly along the rails.
- Use galvanized screws or nails to prevent rust.
- Make sure the tops of pickets are level.
Finally, check the entire fence for any loose pickets or rails. Ensure everything is secure. Paint or stain your fence for extra protection and to match your home’s style. Consider using durable wood choices.

Benefits of Using Wood Fences
Wood fences offer a blend of practical benefits and natural beauty for any property. They create a peaceful and private space, allowing families to enjoy their yards without unwanted views. A six-foot-tall privacy fence helps achieve this sense of seclusion.
Wood fences also provide safety. They keep children and pets inside the yard and block strangers or animals from entering. Enhance privacy with wood fences.
Adding security is another plus. Fences protect your belongings and keep trespassers away from dangerous areas like pools or playgrounds.
Noise reduction is an overlooked benefit. An eight-foot-high solid fence can decrease traffic sounds, making your yard quieter and more relaxing. For instance, in a suburban neighborhood, the reduction in noise can be quite noticeable.
A well-designed wood fence can enhance your home’s appearance. It defines property boundaries and improves curb appeal. This can increase your home’s value if you plan to sell.
Despite these advantages, there are some drawbacks:
- Maintenance: Wood fences need regular cleaning, staining, and repairs to prevent warping and rotting.
- Neighbor Disputes: Boundary fences can cause disagreements. Ensure you and your neighbor mutually agree before building.
- Cost: Installing a wood fence can be pricey, ranging from $2,596.50 to $3,469.50 for a 150-foot-long fence.
- Wildlife: Fences can trap wildlife, causing harm. Consider local wildlife patterns when installing a fence on rural properties.
Even with these disadvantages, many homeowners find the benefits of wood fences outweigh the costs and maintenance efforts.

Maintenance Tips for Wood Fences
Cleaning and maintaining a wood fence ensures it lasts for years. Start by cleaning the fence regularly with water and a mild detergent. This helps remove dirt, mold, and mildew. Use a brush or power washer for deep cleaning. Check out our fence maintenance guide.
Steps to Maintain Your Wood Fence:
- Regular Cleaning: Use a mild detergent and water.
- Fixing Damage: Check for broken or loose boards and repair them.
- Staining and Sealing: Apply wood stain or paint to protect the wood. Learn how to stain your fence.
Inspect the fence yearly for damage. Replace any rotting or damaged wood. Tighten loose screws and nails to keep the fence sturdy. This regular upkeep keeps your fence in top condition.
Tips for Stain and Paint:
- Preparation: Sand rough areas and clean the surface before applying.
- Application: Use a brush or sprayer. Ensure even coverage.
- Frequency: Reapply stain or paint every 2-3 years to maintain protection.
Regular maintenance helps your wood fence remain a strong and attractive addition to your yard. Following these simple steps can keep your fence looking great and lasting longer. Discover expert tips for wood fence maintenance.

Choosing the Right Wood Fence Designs for Your Home
When picking wood fence designs, think about:
- Privacy Needs: Stockade fences with tightly placed boards or board-on-board fences offer great privacy. Both options are good for keeping your yard private. Explore top privacy fencing trends.
- Aesthetic Appeal: White picket fences add charm and curb appeal. They are perfect for a classic look.
- Airflow and Light: Shadowbox fences have alternating boards providing both privacy and good ventilation. Louvered fences with adjustable slats let you control light and air.
- Security: Stockade fences have spiked tops and strong boards, giving both privacy and security.
- Style and Beauty: French gothic fences have a unique spear-like design. They add a sophisticated touch to your yard. Check out classic wood fence design ideas.
- Modern Look: Black cedar horizontal fences offer a sleek, modern appearance. They can make your yard look contemporary and stylish.
- Rustic Appeal: Split-rail fences are durable and blend well with natural surroundings. They are usually seen in rural areas and can define large property boundaries nicely.
- Wind Resistance: Dog ear fences with angled tops are great for areas with high winds. They provide good airflow and a classic look.
Remember to consider the style, privacy, security, and airflow needs of your yard when choosing a fence design. This way, you can select a wood fence that suits your home best. Discover top wood fence panel designs.

Using Wood Fence Panels and Gates Effectively
When using wood fence panels and gates, consider a few practical steps to make the most out of your fencing project. Using ready-made panels and gates can streamline the process.
- Measure the Area: Before installing, measure the area where the fence will go. This will help you determine the number of panels needed.
- Prepare the Ground: Clear the ground of any obstacles and level it. This ensures your fence stands straight and tall. For example, removing rocks and roots can prevent future issues. Read about durable teak wood fencing options.
When installing gates, you should:
- Choose the Right Location: Ensure the gate location is practical for entry and exit. Get tips for installing wooden gates.
- Use Proper Hardware: Invest in good-quality hinges and latches that can support the gate and provide smooth operation.
- Align with Existing Fence: Make sure the gate aligns with the rest of the fence for a seamless look.
Wood fence panels come in various styles and heights, offering flexibility for different needs. They can provide privacy, security, and aesthetic appeal.
- Pre-Treated Wood: Opt for pre-treated wood panels to ensure longevity and resistance to elements.
- Regular Maintenance: Regularly check your wood fence for signs of wear or damage. Reapply sealant as needed to keep it in good condition. Boost aesthetics and durability with staining and painting.
Using these tips, you can effectively install and maintain wood fence panels and gates, enhancing both the functionality and beauty of your home.

FAQs on Home Depot Pickets
When choosing Home Depot pickets for your fencing needs, you’ll find a variety of options. Here are some frequently asked questions:
- What types of wood are available?
- Cedar
- Pine
- Spruce
- Fir
- What are the common picket dimensions?
- Heights: 4 ft, 6 ft, 8 ft
- Widths: 4 in, 6 in
- What styles are offered?
- Dog-Ear
- Flat-Top
- French Gothic
- How are the pickets treated?
- Pressure-Treated
- Paintable and stainable options available
- What are the price ranges?
- From $0 – $10 up to $2000 – $3000
These pickets come in various top styles and application types for easy installation. Choose between dig, no-dig, free-standing, or surface-mounted options.
Explore our services for more information and assistance.

FAQ
What types of wood are available for Home Depot pickets?
Homeowners can choose from cedar, pine, and redwood for Home Depot pickets.
What styles of pickets can I get from Home Depot?
Home Depot offers various styles, including dog-ear, flat-top, gothic, and pointed.
What sizes do Home Depot pickets come in?
Pickets typically range from 4 to 8 feet in height.
What tools do I need to install Home Depot pickets?
You will need a tape measure, level, hammer, screws or nails, posthole digger, shovel, tamping bar, mason’s line, concrete, pneumatic nailer or hammer, furring strips, spacer, wood wedges, safety gear, and gloves.
How do I plan for installing pickets?
Decide on the fence line and mark it, measure the total area, and divide by the width of the picket to know how many you need. Use a consistent gap between each picket for a clean look.
What maintenance do wood pickets require?
Wood pickets need sealing, staining, or painting to protect them from weather damage. Regular cleaning and inspecting for damage are also crucial.
How do I attach pickets during installation?
Attach the pickets to horizontal rails using screws or nails. Ensure that the tops of the pickets are level and space them evenly along the rails.
What are the benefits of using wood fences?
Wood fences offer privacy, safety, noise reduction, and enhanced curb appeal. They also help keep children and pets safely inside the yard.
What are the drawbacks of wood fences?
Wood fences require regular maintenance, can lead to neighbor disputes if not agreed upon, can be pricey to install, and may pose risks to wildlife.
How do I maintain my wood fence?
Regularly clean your fence with water and mild detergent, repair any broken boards, and apply stain or paint every 2-3 years.