
Planning, permitting, and selecting a reliable installer are key steps in a wood fence installation, with timelines spanning four to six weeks. Expect noise during construction phases, and consider regular maintenance to enhance longevity and appearance.
Planning and Permits for Wood Fencing
Starting your wood fence installation involves careful planning and understanding the local permit requirements. These regulations can vary significantly based on where you live, so it’s important to get familiar with the specific rules in your area.
When researching different wood fence types and materials, consider practical factors such as height and location. In many places, a fence taller than six feet will require a permit, especially if you’re in an urban area or near protected zones like wetlands. Areas with denser populations often have stricter permitting rules, while rural areas might be more lenient.
Engage with your city hall or local building inspector early in your planning process to confirm whether you need a permit. The application typically involves presenting a site plan, which may undergo a review process. This step is essential to avoid potential fines or even mandatory fence removal. The permit process usually costs between $30 and $200 and takes from a few days to a couple of weeks to complete.
Material selection is an important aspect of planning. Wood fences might be more forgiving in terms of permit needs compared to masonry ones, but materials still play a role in compliance. Some areas maintain restrictions on materials to ensure safety and aesthetic standards, particularly in residential zones.
It’s wise to confirm your property lines through an accurate survey to prevent disputes with neighbors, a common issue when it comes to fence installations. If your fence will be shared with a neighbor, consider having a discussion upfront, and check if any states like California require a 30-day notice for shared fences. This transparency helps in managing costs and avoiding unforeseen surprises.
Understanding these steps and adhering to local regulations can help your wood fence installation proceed smoothly and enhance your home’s privacy and curb appeal.

Choosing the Right Installer
Choosing the right installer for your wood fence is key to ensuring both the quality and longevity of your investment. Here’s how you can make an informed decision:
Begin by researching potential contractors thoroughly. Recommendations from friends or family who’ve had positive experiences can be invaluable. Examine online reviews and check the company’s standing with the Better Business Bureau. This will not only provide insights into their reputation but also highlight any past consumer complaints.
Before moving forward with any contractor, verify their credentials. Look for appropriate licensing and insurance, such as general liability insurance, which are signs of credibility. Experience and professional qualifications, like a Certification for Fence Contractors, are beneficial. Professional affiliations with organizations like the American Fence Association can indicate a higher level of professionalism.
Engage in a detailed conversation with prospective contractors to assess their competence. Some key inquiries include:
- Confirm if they’ll provide written estimates and whether they handle necessary permits.
- Ask whether warranties for their work are offered and how they address marking boundaries and utilities.
Obtaining multiple quotes is a smart move. It not only gives you a sense of the market rate but also helps highlight any discrepancies in the services offered. Reliable companies are open about their fees and should provide clear, written estimates that detail the work scope, costs, and expectations on payments. A comprehensive contract protects both parties by documenting every agreed detail.
Beware of red flags. For example, steer clear of contractors who insist on cash-only payments or those who pressure you to make quick decisions. Transparent communication and the willingness to answer all your questions are hallmarks of a trustworthy contractor.
Communication is vital. A contractor who is attentive and responds swiftly can make the entire process of installing a wood fence much smoother. By following these guidelines, you can confidently select a fence installer who meets your needs and expectations.
Installation Process and Timelines
When undertaking a wood fence installation, expect a multi-step process that extends from initial planning to final touches, each with its own timeline. Here’s how you can anticipate the stages and prepare for them:
The journey begins with selecting a reputable fencing contractor. Thoroughly examine past projects, customer reviews, and ensure they hold proper credentials. An upfront consultation will help outline your needs, preferences, and budget, setting the groundwork for a successful installation.
Initial Preparations
A critical aspect involves obtaining necessary permits and ensuring compliance with local building codes. Next comes preparation and clearing. This involves removing existing fencing, vegetation, and debris from the site. Clearing defines the working area and facilitates a safe, organized environment for the installation team.
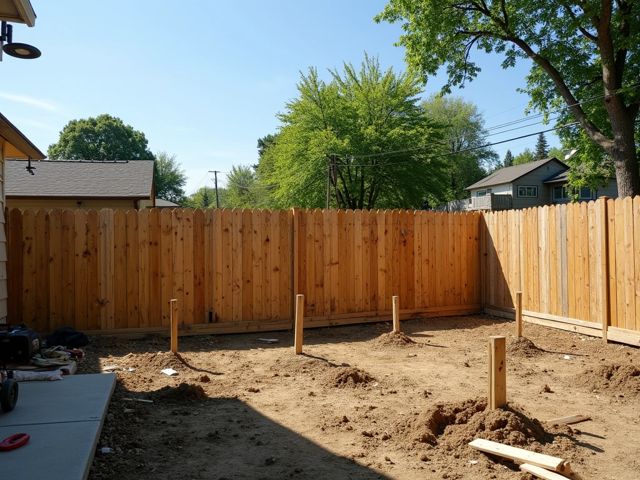
The Construction Phases
Setting the posts is a foundational step, where stability is key. Posts must be anchored deeply to resist environmental challenges, taking anywhere from 1-2 days for concrete curing. Once the posts are set, it’s time to attach the rails and panels, which demands precision for long-term durability and visual appeal.
The entire installation timeline can span four to six weeks, subject to factors like seasonality, weather conditions, and unforeseen project scope changes. To avoid delays, schedule installations well in advance during peak seasons.
Noise and Disruptions
Noise levels can fluctuate throughout the installation. The use of motorized augers for digging post holes and handling heavy materials contributes to a temporary increase in sound levels. Homeowners might consider coordinating with neighbors about noise expectations to maintain neighborhood harmony.
Final Steps and Inspection
Concluding the installation involves finishing touches and a comprehensive cleanup. Decorative elements, gates, and hardware complete the structure, followed by an inspection to guarantee quality workmanship. The final inspection ensures the fence meets aesthetic and functional standards before final payment is due.
A wood fence installation may seem complex, but with careful planning and clear communication with your contractor, it enhances the property’s security, beauty, and value, creating a worthwhile investment for any new homeowner.

Cost, Maintenance, and Longevity
Choosing between DIY and professional installation for a wood fence involves considering costs, maintenance, and longevity. A DIY approach might seem appealing due to the absence of labor costs. A professional installation, typically ranging from $1,711 to $3,290, incurs more immediate expenses. Doing it yourself reduces these costs but requires consideration of potential hidden expenses related to materials and necessary tools, especially for complex tasks or challenging terrains.
For those with time and a knack for craftsmanship, DIY installation offers customization options, letting you pick from various woods like pine, cedar, and redwood. It brings the benefit of scheduling the work at your convenience and the satisfaction of personal accomplishment.
Engaging professionals guarantees quality. Professional teams provide comprehensive services, ensure compliance with local regulations, and bring expertise in material selection, which accounts for soil type and climate. This leads to a fence that’s visually appealing and long-lasting, with minimal issues like gaps or misaligned posts that could arise from DIY efforts. This expertise ensures the aesthetic and structural integrity of the fence and might offer savings in the long run due to reduced maintenance needs.
Both installations require regular care to maintain appearance and extend lifespan. Staining or sealing every few years can make a significant difference in durability. The wood type and local climate determine how often these tasks should be performed. Budgeting for these periodic maintenance tasks preserves the wood’s beauty and structural integrity.
Choosing between DIY and professional installation depends on individual circumstances, budgets, and preferences for involvement in the project. Whether seeking peace of mind from professional expertise or the fulfillment of a hands-on project, understanding the details of each option helps homeowners make decisions that align with their vision.

FAQ
What should I consider when planning a wood fence installation?
Begin by understanding local permit regulations and factors like fence height, location, and materials, which impact permit needs. Engage with local authorities about permits and confirm property lines with a survey.
Do I need a permit for my wood fence installation?
Fences taller than six feet often require a permit, particularly in urban or protected areas. Check with city hall or a building inspector early to understand specific requirements and be prepared to provide a site plan during the application process.
How much does a fence permit cost, and how long does it take?
Permits typically cost between $30 and $200, with a process that can take from a few days to a couple of weeks. Factoring this into planning helps avoid fines or removal later on.
How do I choose the right installer for my wood fence?
Research potential contractors through recommendations, online reviews, and check their standing with the Better Business Bureau. Verify licensing, insurance, and affiliations with professional organizations, and gather multiple quotes for comparison.
What questions should I ask a potential fence contractor?
Inquire about written estimates, handling of permits, offered warranties, and how they manage marking boundaries and utilities. Transparent communication and the ability to address your questions are key indicators of a trustworthy contractor.
How long does the wood fence installation process take?
Installation spans four to six weeks, depending on seasonality, weather, and project changes. It involves obtaining permits, site preparation, setting posts, attaching rails and panels, and a final inspection. Scheduling during peak seasons in advance helps avoid delays.
What should I expect regarding noise and disruptions during installation?
Noise levels vary due to motorized equipment. Consider informing neighbors about potential disruptions to maintain harmony. Coordination helps during the process.
Should I choose DIY or professional installation for my wood fence?
DIY installation reduces labor costs and allows customization but requires skills and tools. Professional installation offers expertise, compliance, and long-term savings due to durability and fewer maintenance issues.
What kind of maintenance does a wood fence require?
Regular maintenance, including staining or sealing every few years, helps preserve appearance and longevity. Frequency depends on the wood type and local climate. Budgeting for maintenance tasks ensures the fence remains beautiful and robust.